| .plastic | ||
| Assets | ||
| imgs | ||
| Packages | ||
| ProjectSettings | ||
| SigningKey | ||
| UserSettings | ||
| .gitignore | ||
| .vsconfig | ||
| ignore.conf | ||
| Readme.md | ||
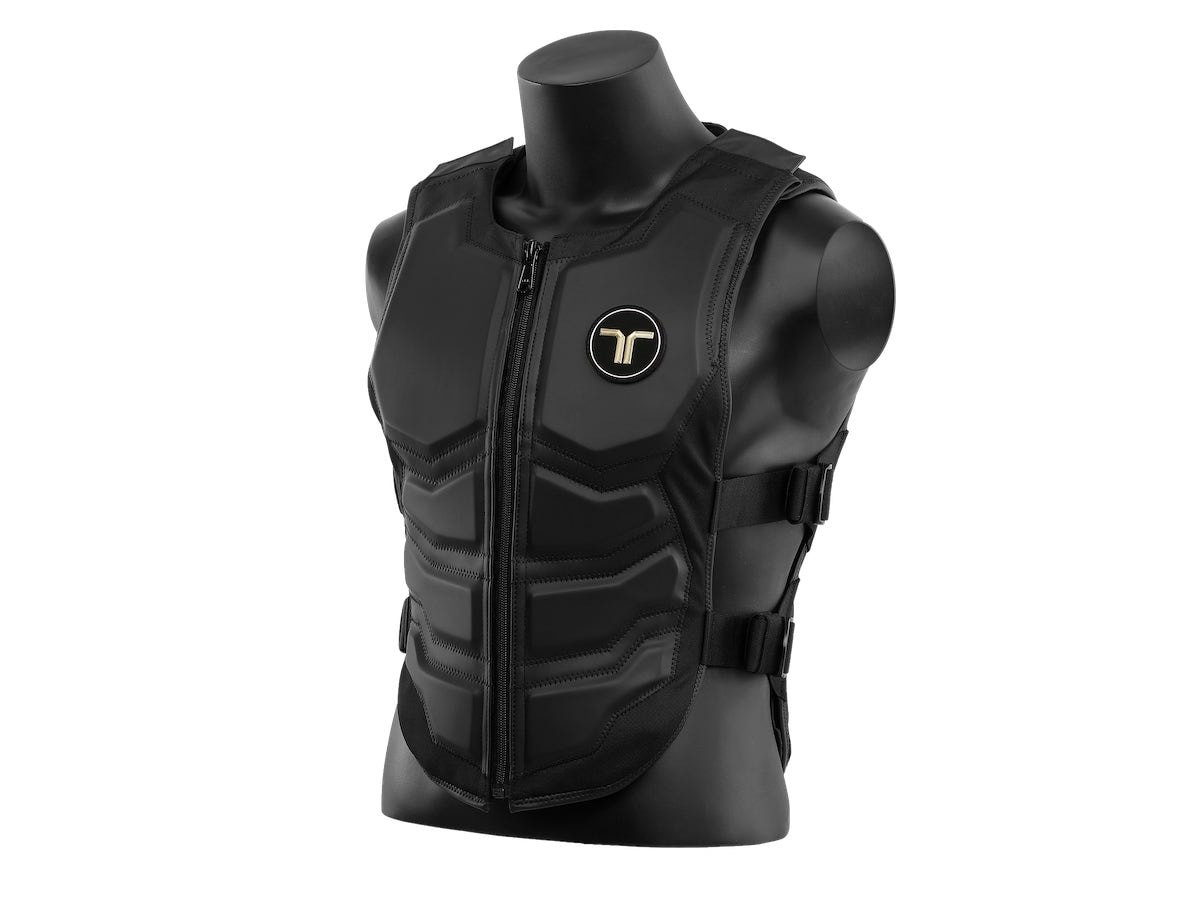
Haptic Suit
- Author: Rossi Stefano
- Publish Date: 26.01.24
- App Lab
- Unity Project
- Demo Video
Abstract
In this document I will explain how I designed and implemented this mini-project. The basic idea was good but I wanted to add some complexity to the project.
Initial struggles made me lose a lot of time at the beginning. Because of many reasons explained in the conclusion, but once I understood how things are supposed to work, I managed to implement all I wanted to for this project.
The idea was to implement a component to link the haptic feedbacks to any element in the scene, so that the feedback could be used as directional indicator. In this case as a directional indicator to another point in the scene. This point could be potentially any game object.
Also, as bonus point I added visual indicator in the form of an Arrow with the intention of indicating the target.
In the demo, i implemented 2 small scenarios. The first to make the user familiarize with the haptick and visual feedbacks. The second to test the StepLink system event-driven potential.
To do so I implemented a little framework to manage the steps needed to complete a list of steps.
Every list/step can be parametrized to call different callbaks in different times of the a step. Steps are grouped in Lists. And lists are grouped in a dedicated manager. A step will run until completion/stopped.
Separation of concerns is implemented for steps and lists decoupling them from the game objects and from the haptic and visual feedbacks.
Strenghts
The haptic could be a system to hint the user and at the same time does not provide brainless instructions.
It could be linked to any other scene element. Like tracking another person or items in the room. It's not a problem to link it with moving objects.
This implementation could be extended any to other environnment.
Weaknesses
Using a step by step approach could be interesting for many tasks.
For instance, when preparing the needed items, the user may think at a band aid but the suit could point to a syring. This could create confusion.
A solution to this would be, for instance, to add the possibility to (re)address to another step. The user will indicate it with another interaction, for example, vocally.
Anyway, it's also possible to use more visual hints to indicate the multiple targets. In theory, the same is possible for the haptic feedback but it's clearly not a good idea to use more than one haptic feedback at the same time on the user.
1 Conception
In this step I will conceive the functionality with the 5 As good practices.
Address
How do I address one (or more) of many possible devices/objects?
Haptic
In this case, the suit will automatically start indicating a direction and distance based on the position if the element addressed.
The system is programmed to managed when and how that happens.
Arrow
A visual aid appear automatically to indicate the next step. At the position the target is.
The system is programmed to managed when and how that happens.
Attention
How do I know the system is ready and attending to my actions?
Haptic
The system will start the feedback automatically. Usually, when the previous action is completed.
If needed, more feedbacks (audio, visual, ...) may be added.
Once a new step is started, the vibration is evident.
To reduce the battery consumption the feedback will be limited, but the idea of continuous vibration will be enough to notify the user.
If no steps are active or tracked, the suit will not be active.
Arrow
The system will start the feedback automatically.
Action
How do I effect a meaningful action, control its extent and possibly specify a target or targets for my action?
The user wont command the feedbacks actively.
Alignment
How do I know the system is doing (has done) the right thing?
Haptic
The more the intensity of the feedback the more the distance.
There is an option configure a threshold distance to start reducing the strenght.
Only one item/step at the time will be targetted, this will prevent confusion for the user.
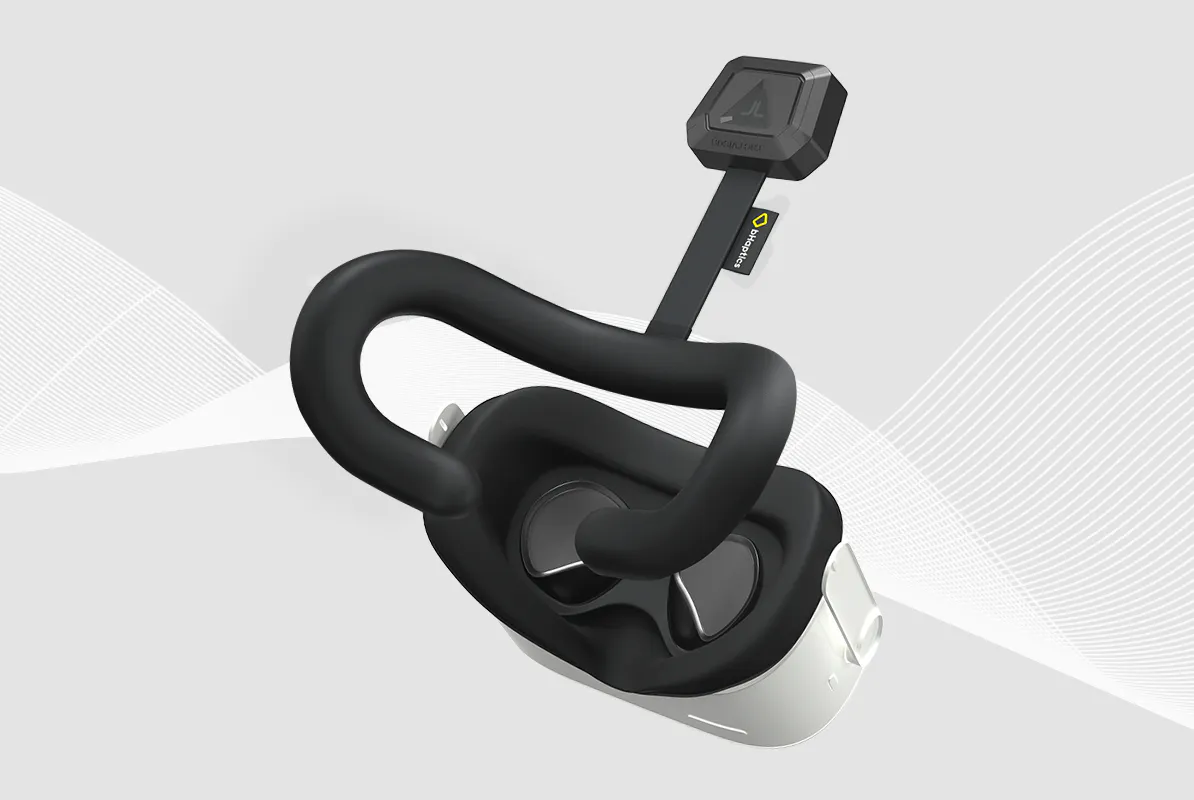
The main feedback is on the suit, the tactvisor will be activated when the user is directly looking at the object. This function can be deactivated in haptic manager prefab.
In the demo, the tactvisor function is activated, but the tactvisor bluetooth module is broken so this is the third option: looking at the object wont generate any effect.
The idea of this functionality is to not give the user a detailed indication because the idea is to help the learning by stimulating an active mental effort.
The feedback will dinamically adapt so that the user will be actively notified based on his position and direction.
The direction and distance are adapted automatically to guide the user.
To reduce the battery consumption the feedback will be limited:
- lower intensity
- smaller feedback area
- reduced/delayed active time
- choosing the correct haptic "effect"
- no effect if near enough to grab it
Once the step is complete, the next step effect will be played automatically to notify the user of completion.
If no more steps are needed, the scene will notify the completion.
The item doesnt need to interact actively with the suit.
Arrow
Similar concept, but the Arrow won't adapt to guide the user, it will only be a visual hint over the object. It is automatically placed by the system.
If the target moves, the arrows moves with it.
Accident
Haptic
The "mistakes" with this functionality will happen only when the user goes in the wrong direction. In this situation, the suit will change the feedback according to notificate the user.
Since the user can't command the suit, no wrong action are possible in this context.
If the user does the wrong action (like picking the wrong item), the suit wont notificate it to reduce the risk of this behaviour.
Arrow
The user is espected to know he's looking in the wrong direction by not seeing the visual hint.
2 Implementation
This second part of the doc will guide the user in the setup and learning of the implemented project.
Setup instructions
Set up the hardware and software
This steps are needed to connect the suit and the tactvisor to the oculus oculus.
NOTE: The tactvisor bluetooth conneector is broken, it won't enter pair mode.
- Turn on the oculus and enable bluetooth
- Turn on the suit. It must not be connected to another device, the led will blink to indicate indicate the pairing mode. Pair the suit with the oculus and the tactvisor
- (Optional) Repeat for the tactvisor, but for the quest 2 it needs velcro stickers to be attached to the headset
- (Optional) In the oculus store install the bhaptic tactor app. Open it and test if it's all working working
Note: activate the hand/body tracking in the oculus settings to use the hand tracking in the unity project
Set up the unity project
This is only needed for development
References
List of all usefull references to look for infos.
bHaptics
Plug in deployed events to Unity
Open XR
Other
Dependencies
These steps are needed to set up unity to work with the suit and the tactvisor. Not needed to run the standalone apk.
Optional steps could be avoided, but it's better not
- NaughtyAttributes
- bHaptics Haptic Plugin SDK 2.1.3
- bHaptics Player installed (connected to the tactsuit and tactal)
- Unity 2022-3-10f1
- Environnement_HEdS_TD.unitypackage
- Window > package manager
- XR plugin management: 4.4.0
- XR Interaction Toolkit: 2.3.2
- Starter assets
- Tunneling vignette
- Hands Interaction Demo
- XR Hands: 1.1.0
- Hands Visualizer
Settings
- File > Build settings: Android, HedsRoom scene
- Edit > Project settings:
- player:
- android:
- other:
- min sdk 30 (min for bHaptics SDK)
- other:
- android:
- XR plugin management
- pc: OpenXR (if enabled, disable Oculus to prevent assets loading)
- android: OpenXR (if enabled, disable Oculus to prevent assets loading)
- OpenXR:
- PC:
- play mode: Oculus OpenXR
- intection profile: Oculus Touch controller
- OpenXR Features:
- Hand Tracking Subsystem
- Meta Aim Tracking
- Android: OpenXR
- Interaction profile: Oculus Touch controller
- OpenXR Features:
- Hand Tracking Subsystem
- Meta Aim Tracking
- Quest support
- PC:
- player:
- bHaptic > Developer Window (created after installing the plugin):
- Login with a developer account and add the haptic feedbacks premade in the web app:
- APP ID: tJfDw8zytlei7HnDPBAu
- API Key: 888nPaRgYbHT77w24YTj
- Login with a developer account and add the haptic feedbacks premade in the web app:
NOTE: Since I developed and tested Completely with the Hand tracking, it must be enabled in the oculus settings. If desired, the controllers can be used too, but I didnt test it and it beter to use hands to pick objects anyways.
Design
There are essentially 4 prefabs and 5 scripts in this implementation:
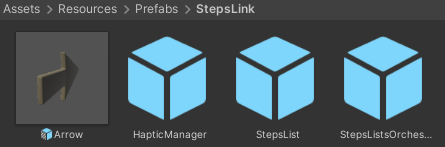
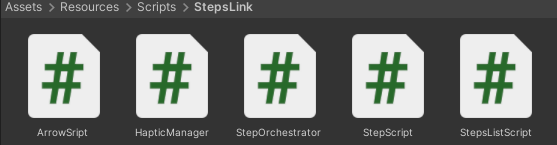
Each prefab has its script, while the StepScript must be added to a game object. It doesn't matter if it has a model or not, it could be anything, there is no particular limitation it could even be the rapresentation of another person moving in the scene.
I used the NaugthyAttributes library to document the code and also to create a dynamic and documented script in the Unity inspector. This means that is not clear what a component does, it's enough to read the inspector and eventually show the popup hovering with the mouse pointer on the attribute in question.
Arrow
This prefab consist in a flaoting arrow that will float and rotate over the marked object.
Since apparently its a bad practice in unity to instantiate and destroy objects, I decided to use a single arrow that will be moved and rotated over the target object. Showed and hidden when needed. The arrow will take a reference object and will be placed over it.
Public Methods
This prefab has the script "ArrowScript" linked. This script has the following public methods:
- HideArrow: is only a shortcut to hide the arrow
- ShowArrow: same but to show
- SetTargetObj(obj): this is used to tell the arrow what object to point
To use it, just call the SetTargetObj(obj) and it will automatically track it.
// just call this
public void SetTargetObj(GameObject obj)
{
    targetObj = obj;
}

// here the arrow is updated
public void Update()
{
    // rotate on y axis
    transform.Rotate(0.5f, 0, 0);

    // if the target obj is not null
    if (targetObj != null)
    {
        // place the arrow over the target obj
        PlaceArrowOverObject(targetObj);
    }
}

// this is the method that actually place the arrow over the obj
private void PlaceArrowOverObject(GameObject obj)
{
    // get the obj position
    Vector3 objPos = obj.transform.position;

    // put the arrow over the obj
    transform.position = objPos;

    // rotate the arrow to face the obj
    // not really needed, but it's nice for a future implementation
    transform.LookAt(obj.transform);

    // increase the arrow height from the obj top
    transform.position += new Vector3(0, 0.3f, 0);

    // show
    ShowArrow(obj);
}
HapticManager
This sript is used as custom unterface to manage the bhaptic library.
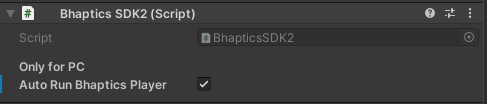
The [bhaptics] library prefab must be in the project, this prefab should also contain the Dispatcher from the library. In the [bhaptics] I added my HapticManager that will be used to config the steplink. It can be used to easily call all methods to use the suit.

Be sure to check the Auto run player to gain time.
Also, in the HapticManager check the parameters. The main camera is the center of the link system. It could be potentially any GameObject but for the StepLink functionality the player camera is the best option.
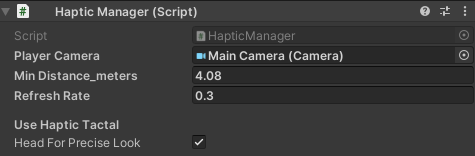
Refresh rate is the time between each step On Update Callback (explained in the StepScript chapter). It's used to synchronize the Step Link Event system and the time based events of the bhaptic feedbacks implementation, Basically, these frequence must be the same than those in the StepLink system to assure the calls are synchronized. The default value is 0.3 second, but it can be changed to any value. 0.3 seems a good compromise between seemlessly reactivity and battery consumption.
Each of this parameter is documented directly in the inspector with the NaughtyAttributes library.
Public Methods
Public methods here are used to call the manager to play an effect. Some effect have an obj as parameter, for these methods the effect played will be directional compared to the origin of the haptic manager.
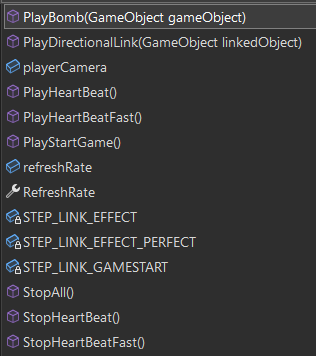
- PlayBomb(obj): just play the bomb effect, but with a directional effect
- StopHeartBeat/Fast(): Play the heart beat effect in 2 different intensity
- StopAll(): effects have a time, this will force to stop any playing sffect
- PlayStartGame(): play the effect linked to this
- PlayDirectionalLink(obj): this is the main effect used as the main project scope
PlayDirectionalLink(obj) have to be called continuously every second (or every framerate set), so that it will play the effect in the new position.
This effect is created with the bhaptic designer, it just a simple effect in the middle of the chest. The script will automatically calculate the correct distance and angle with the target obj and will play the affect with the adapted x and y direction.
The direction cannot be calculate with a simple "product over norm" operation, because the cosinus will lose a dimension. So I had to separate the base over the 2 plans:
private float ComputeYZAngle(GameObject camera, GameObject target)
{
    //plane of the, create 2 vectors to use for the angleXZ calculation
    Vector2 cameraPositionYZ = new(camera.transform.position.y, camera.transform.position.z);
    Vector2 targetPositionFromCameraYZ = new(target.transform.position.y, target.transform.position.z);

    Vector2 cameraToNextObjectYZDirection = targetPositionFromCameraYZ - cameraPositionYZ;
    cameraToNextObjectYZDirection.Normalize();

    Vector2 cameraDirectionYZ = new(camera.transform.forward.y, camera.transform.forward.z);

    return Vector2.SignedAngle(cameraDirectionYZ, cameraToNextObjectYZDirection);
}
private float ComputeXZAngle(GameObject camera, GameObject target)
{
    Vector2 cameraPositionXZ = new(camera.transform.position.x, camera.transform.position.z);
    Vector2 targetPositionFromCameraXZ = new(target.transform.position.x, target.transform.position.z);

    Vector2 cameraToNextObjectXZDirection = targetPositionFromCameraXZ - cameraPositionXZ;
    cameraToNextObjectXZDirection.Normalize();

    Vector2 cameraDirectionXZ = new(camera.transform.forward.x, camera.transform.forward.z);

    return Vector2.SignedAngle(cameraDirectionXZ, cameraToNextObjectXZDirection);
}
Also, the intensity is calculated with the distance of the 2 points:
private float ComputeIntensitiy(GameObject camera, GameObject target)
{
    float distance = ComputeDistance(camera, target);
    float intensity = distance > minDistance_meters ? 1 : distance /= minDistance_meters;
    return intensity;
}

private float ComputeDistance(GameObject camera, GameObject target)
{
    float distance = Vector3.Distance(camera.transform.position, target.transform.position);
    return distance;
}
Whith this is then possible call an effect with the correct offsets:
// intensity: 1f, The value multiplied by the original value
// duration: 1f, The value multiplied by the original value
// angleX: 20f, The value that rotates around global Vector3.up(0~360f)
// offsetY: 0.3f, // The value to move up and down(-0.5~0.5)

BhapticsLibrary.PlayParam(STEP_LINK_EFFECT,
                    intensity: intensity,
                    duration: RefreshRate,
                    angleX: angleXZ,
                    offsetY: offsetY);
This concept can be applied to any effect.
StepsListsOrchestrator
This is a container of list. It is directly documented in the inspector with NaughtyAttributes library. The idea of these 3 scripts is to provide a small framework to implement an ingame event system.
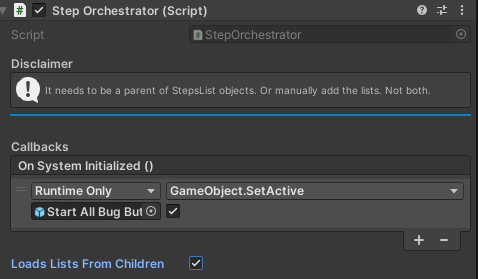
It can load the lists from its children. Or the lists can be specified manually. The children, to be loaded, must have a StepsList script attached.
Public Methods

It's possible to start the list by name or index or just play all one after another in the children (or manually specified) order.
The whole StepLink system is designed around Asynchronous Coroutine events using IEnumerator(s). This will potentially allow to create and start many StepsListsOrchestrator/ListSteps/Steps at the same time for more advanced use cases.
For example:
/// <summary>
/// Run a list by index
/// </summary>
/// <param name="index"></param>
/// <exception cref="Exception"></exception>
public void RunListByIndex(int index)
{
    if (!isInitialized)
    {
        throw new Exception("The step link system is not initialized");
    }
    else if (isRunning)
    {
        throw new Exception("The step link system is already running a list");
    }
    else if (isInitialized && !isRunning)
    {
        if (index < stepsLists.Count && index >= 0)
        {
            StartCoroutine(stepsLists[index].StartSteps());
        }
        else
        {
            throw new Exception("Invalid index of list, list has " + stepsLists.Count + " elements");
        }
    }
}
StepsList
Lists are containers of steps. The StepsList adds a controller layer to chronologically manage its steps.
It's important to introduce here the concept of On <chronologic-semantically-correct-vocable-here>.
The idea to to provide a way to call methods at the desired time time through an event-driver framework provided with the StepLinks system. It could be usefull to call methods before or after the list is started and after is ended without using the StepScript callbacks.
It can add the steps from its children, it only loads those with a StepScript attached. Alternatively, Steps with a StepScript component can be attached manually, this is usefull to attach steps from other lists of objects placed anywhere in the scene's hierarchy.
Like all other script, is documented in the inspector with the NaughtyAttributes library.
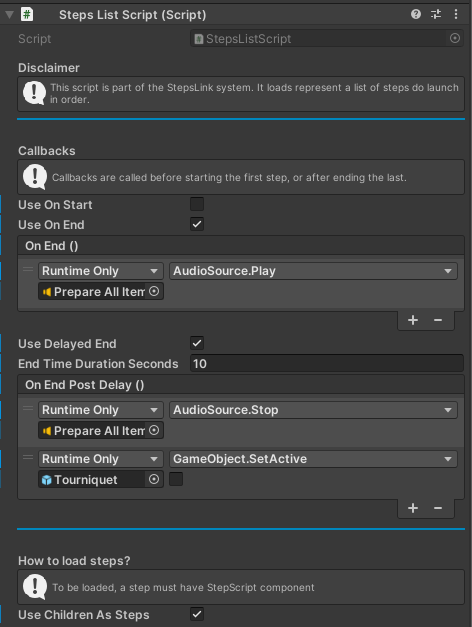
Public Methods
It has no public elements that are interesting to be called in other situations. To start a list the StepListOrchestrator must be used.
Step
The StepScript needs to be added to any GameObject that is intended to be a step loaded on a list.
A step is a decoupled concept from any other GameObject. It is meant to be managed by a list.
It is documented in the inspector with the NaughtyAttributes library.
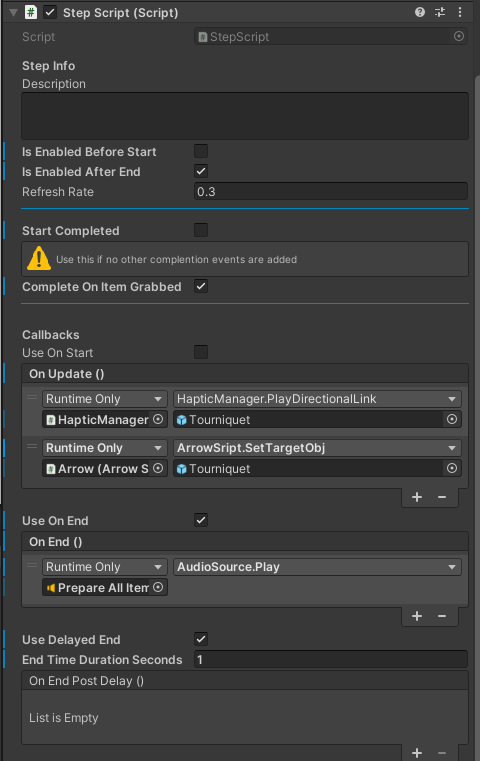
The StepScript has 4 groups of callback:
The On Start is used at the step is started.
The On Update is called cyclically until the step reach the stop condition. The refresh rate set in the HapticManager will be used as timer for the step refresh. Here is where the step link method can be called to be updated at the desired refresh rate.
Ending Conditions:
- If its linked to an XR interactable object it can be set to automatically complete when the object is grabbed.
- A second option is to set to be already completed, this is usefull to just use a step as delay, or to something else particular.
- The third option is to call the public end event from any other unity object.
The On End callbacks are called after the step reached its ending event and after the On Update cycle is ended.
It is possible to define a delay and then use the DelayedEnd callbacks group.
3 Test protocol
The StepLink system is used to play 2 lists that will be used as test scenarios.
The first list is meant to test the haptic directional feedback and the arrow visual pointer. It's a list of items to pick, each step is ended once the item is picked. The arrow and the haptic link are active torward the next active step.
Once the first list is complete, the second will start. This is meant to implement a slighter more complex scenario, to test the StepSystem chronomanagment potential through IEnumerator callbacks and the manually linked steps functionality of items anywhere in the hierarchy.
It also test some other HapticManager effect like the directional bomb and uses other XRInteractable events to complete steps.
Before opening the simulation be sure to have the the suit and the tactvisor(if not broken) connected to the oculus. Also, be sure to the the hand tracking enabled in the oculus settings. Both are explained the the Setup instructions.
The demo is meant to be played with the hand tracking, but it can be played with the controllers too.
In the hand tracking, the locomotion system is implemented through teleportation. The teleport is activated by pressing the index and thumb together.
Once loaded the simulation, familiarize with the teleportation system and the hand tracking.
To start the test, just hit the button and then follow the feedbacks. Both visual and haptic feedbacks will be used in the first list.
Conclusions
As anticipated in the abstract, I had many problems actually starting implementing this project:
- Lack of documentation: All the needed documentation is well hidden, of even not existent, especially the documentation for the Open XR libraries.
- Old versions of Open XR: Versions used in this base project are too old. It's a shame because I felt I lost a lot of time doing/learning thing that I shouldn't have since I saw many changes with the newer versions. For instance, I wanted to implement the function of HandGestures recognition. A the newer version of Open XR Hands already implements a base for this, but not this version, so I gave up the idea.
- Outdated TD 2: The tutorial of the TD 2 is not up to date, so it took me a lot of time just to configure the basic settings to start programming
- Annoying instant sleep of the quest 2: Apparently it's not possible to disable this feature even with the Meta Quest Developer Hub, and the quest keeps disconnecting from AirLink. The XR Device Simulator could help, but it's not a solution. And like if this isn't enough, covering the visor internal camera that detect the head is not enough, because it detect the lack of head movements. Probably because the OpenXR is not supported like the Meta Framework.
- Control versioning: I ended using both git + unity CVS as side support, but it took time but I would have liked a introduction in the unity CVS
I am not sure how much it make sense to still use the OpenXR lib. Definetly not an outdated version and not for a project even if it's a small project like this.
The problem is that I lost a lot of time to figure out how to do things in the outdated version and I am not sure if it was worth the effort. In facts I would have preffered use that time implementing more in the project and I ended up stopping with a basic implementation.
For example, I lost too much time with the XRHands lib and ended up give up when i found out the last version is completely different and also works.
All considered, I learned something relevant about unity. I always had the idea but never had a motivation to enter this side of the IT. This allowed me to reach a level where I am now fluent enough to explore the Unity ecosystem withouth being submerged in too much new concepts all at once.
Once surmounted the evident initial struggle it was fun to implement the project.
In fact according to what I read, I may have even build a good fundamental of VR development because the meta framework should be easier to use, even if it loses the PCVR potential.